Methods Of Concrete Curing

 Home / Concrete / Methods Of Concrete Curing

Contents  show 

What Is Curing Of Concrete?

The process of protecting the moisture of concrete surface and enhancing the hydration of cement is known as curing. The physical properties of concrete totally depend on the hydration of cement. If curing is not done properly concrete will be failed to acquire its full strength. Improper curing may also lead the concrete to crack.

Purpose Of Curing

i) To Complete the hydration process between cement and water.

ii) To achieve the maximum strength of concrete.

iii) To prevent the concrete structure from cracking.

Methods Of Concrete Curing

1. Shading

By this method, the evaporation of water is locked in the concrete surface. It also protects the surface from heat, wind, etc. In cold climates, it prevents the concrete from freezing by preserving the heat of hydration of cement.

2. Covering The Surface

In this method, the concrete surface is covered with wet gunny bags or waterproof papers to avoid water loss and to protect the concrete from further damage. This method gives satisfactory results for concrete slabs and pavements.

3. Sprinkling Water

In this method, water is sprayed on the concrete with the help of nozzles at proper intervals. This method is not so effective due to the difficulty of keeping the concrete surface be moist all the time.

sprinkler curing

4. Ponding

Ponding is the most common method that is adopted for curing concrete floors, slabs, pavements, etc. In this method, the concrete surface is first covered with a moist wrapper for 24 hours.

After that, the covers are then removed and a small amount of clay puddles are constructed around all the area. Then water is filled for final curing.
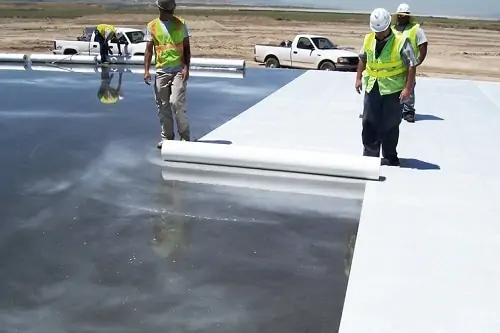
curing by ponding method

5. Membrane Curing

In this method concrete surface is covered by waterproof membranes or sealing compounds such as bitumen emulsion, wax, rubber latex emulsion, water repellant, plastic films, etc.

The membrane protects the water loss from concrete. It is seen membrane curing for 28 days gives equivalent strength to two weeks of moist curing.

membrane curing method

6. Steam Curing

Steam curing is done by increasing the temperature of concrete in wet conditions. This method allows the concrete to achieve its full strength within a short time; thus, curing is also finished within a short time. Steam curing is mostly adopted for the production of precast members.

Minimum Concrete Curing Time

The curing period should be as long as practical. Atmospheric temperature plays an important role in the process of curing as it affects the hydration process which is an exothermic reaction.

Maintaining proper temperature is also essential as it also determines the curing time. For most concrete structures, the curing period at temperatures above 5º C should not be less than 7 days or until 70% of the specified compressive or flexural strength is achieved.

The period could be reduced to a minimum of 3 days if high early strength cement is used and the temperature is above 10ºC. As per IS 456 – 2000, concrete should not be cured less than 7 days for OPC, & 10 days for concrete with mineral admixtures or blended cement.

In case of hot weather and dry temperature conditions, the minimum curing period should be 10 Days for ordinary portland cement and 14 days for concrete with mineral admixtures and blended cement.

The curing time depends on the following factors:

  1. Types of structural members.
  2. Size and Shape of the member.
  3. Type of cement used,
  4. Mixture proportions,
  5. The required strength of concrete.
  6. Grades of concrete.
  7. Atmospheric temperature.
  8. Method of curing.

1. What is the curing period of concrete as per IS code?

FAQ:

Minimum 7 days for OPC and 10 days for concrete with mineral admixtures or blended cement.

2. Why curing of concrete is important?

Curing is very important for concrete to achieve full strength. If curing is not done properly the concrete will be failed to acquire its full strength Which may also lead the concrete to crack.

3. What is the fastest way to cure concrete?

By covering the concrete with plastic tarps. It will lock the moisture escaping from the concrete surface.

4. How long does 4 inches of concrete take to cure?

Minimum 7 days.

I hope you now have enough knowledge about curing and its methods. If you have any questions regarding this, feel free to ask me in the comments. I will try to answer as soon as possible. Thanks.

Design Criteria Of Septic Tank

 Home / Construction / Design Criteria Of Septic Tank

Septic Tank:

Septic tank is a tank where sewage is kept a long time for sedimentation of suspended solid by anaerobic microorganism activity.

Septic Tank Design

Basically, the tank is rectangular in shape consisting of rooftop with two chambers, isolated from each other by a baffle wall. The first chamber is called grit chamber in which the sewage enters first and the rest one is called anaerobic chamber.

Inlet and outlet pipe should be fitted in such a manner that while entering or existing there should not be any unsettled influence in the sewage of anaerobic chamber. Sand, grit etc is settled down in the grit chamber before the sewage is directed to the anaerobic chamber. In the anaerobic chamber, natural solids settle at the base of the tank where anaerobic bacteria follows up on it and changes over complex unsteady mixes to more straightforward stable mixes.

Septic Tank Design:

The following measure should be kept in view to design a septic tank:

1. The floor zone of the git chamber must be adequate to decrease the speed of steam and to allow sedimentation.

2. The capacity of a septic tank should be sufficient to give a detainment period fluctuating from 12 hours to 3 days, 24 hours time frame is normally viewed as satisfactory.

3. The depth beneath segment divider opening should be adequate to allow aggregation for the predetermined period. A minimum area of 0.07 m2 for each client in grit chamber and minimum volumetric substance of the grit chamber of 0.02 m3 for every client is required.

4. The minimum width and depth of a septic tank should be 0.75 m and 1 meter underneath water level. The length should be 2 to 4 times of the width. The minimum capacity of a septic tank is granted 1 m3.

5. Every septic tank should be furnished with a ventilating channel minimum diameter of 5 cm.

What Is Floating Column – Its Advantages And Disadvantages

Home / construction / What Is Floating Column – Its Advantages And Disadvantages

Nowadays, every multi-story building (residential, commercial, industrial, etc.) requires an open ground story for parking space, lobbies, conference halls, banquet halls, etc.

So the ground floor needs to keep free without construction except for columns. Conventional columns which are closely spaced are not preferable on ground floors. To avoid this, discontinuity in columns is required, and here floating column comes into existence.

Contents  show 

What Is Floating Column?

Floating column is a type of column that is constructed over beams or slabs of any intermediate floors of a structure. These columns are not attached to any footings or pedestals. Floating columns are also known as hanging columns. (Refer to the below image)

How Load Transfers In Floating Columns

The load-transferring mechanism in floating columns is totally different from ordinary columns. In ordinary columns, the load is transferred from the column to the foundation and then to the surrounding subsoil.

But floating columns do not transfer loads directly to the foundation. Instead, they transfer loads to the beam or slab on which they are constructed, and the load acts as a point load.

floating column

Advantages Of Floating Columns

1. Floating columns are mainly used to fulfill the architectural requirements of a structure. They are very useful when the lower floor has a large span hall having rooms on its upper floor such as hotel, auditorium, etc.

2. They are useful in the construction of soft storeys.

3. The plan on each floor can be varied.

4. The rooms can be divided and some portions can be raised without raising the whole area.

Disadvantages Of Floating Column

1. The main disadvantage of floating columns is it suffers from an earthquake. Beams supported by these columns may experience a large amount of shear, bending, and torsion. However, this problem can be redeemed but is still not advisable in case of lateral loading.

2. As stated above, it attracts extensive forces.

3. It increases storey displacement in buildings.

4. As the columns do not rest on primary continuous columns, discontinuity happens with the below and above columns which makes them vulnerable.

Floating Slab – Construction, Advantages, & Disadvantages

 Home / Construction / Floating Slab – Construction, Advantages, & Disadvantages

What Is Floating Slab?

A floating slab is another type of concrete slab laid on the ground with no support. The slab is built in two stages. Footings are cast individually in the first stage, and then the center floor of the slab is poured.

Because of the floating slabs, the ground preparation is reduced to a larger extent. Since the floating slab does not have a connection with the foundation, it is also called a monolithic slab.

floating slab details

This type of slab is used when the structure requires low bearing capacity. This foundation is suitable for small structures where a deeper structure is not required and when additional infrastructure is not needed.

Floating slabs are used as the foundation for small structures such as manufacturing workshops, sheds, and garages. Let’s discuss its construction process.

Why Use Floating Slab?

Floating slab is one of the most economical foundation construction methods. Traditional foundations require a strip footing with a frost wall above. The strip footing installed below the frost level is usually 4 inches below grade. The cost of a strip footing and frost wall is higher because more excavation, concrete, and labor are required.

Construction Procedure Of Floating Slab

To begin the construction of floating slabs, the planned building requires a stable foundation to completely sustain the entire weight of the superstructure.

As previously said, they are more commonly utilized in garages, home additions, and sheds that do not require large foundations. Structure-wise, these structures are light.

When compared to conventional slab construction, floating slabs are proven to be the most suited and cost-effective. The steps involved in the construction of a floating slab are described below.

1. Site preparation

The first step is to inspect the site where the floating slab will be built. Clear the site of any trees, small shrubs, or other debris. Then, make an excavation plan, including where to dig and where to take the soil.

2. Excavation

After all the preparation, the next step is to excavate the site. Excavate the area for the slab in accordance with the level. In this step, make a drainage channel on the sides for water to drain out through the gravel base.

Source: cementwright.ca

Water will be removed from the concrete slab foundation by sealing the trench with geotextile and gravel. Make sure to cover this channel with waterproofing material.

3. Laying Gravel Base

In this step, gravel is spread over the area to allow unwanted water to drain.

4. Reinforcement For Slab

After laying the gravel base, the next step is to prepare reinforcement as per the structural design. Lapping should not occur in a single location during reinforcement; instead, it should occur in a different manner.

floating slab reinforcement

Source: waddelleng.com

In addition, the reinforcement must be in accordance with the slab’s dimensions and specifications in order to strengthen the structure.

5. Shuttering

Now, it is time to begin shuttering. The formwork may require a smooth surface, proper alignment, and good quality work. To prevent the formwork from opening during concrete pouring, the cover block should be fixed after shuttering.

6. Concreting

Concrete can be made on-site in a concrete mixer, or ready-mixed concrete can be used for floating slab concreting. All materials are mixed in a proper mixer machine to achieve high strength.

Adequate compaction should be performed during the concreting process. Depending on the area and workmanship, it is compacted by hand or by a mechanical vibrator. After 24 hours, the shuttering should be removed.

floating slab construction

Source: waddelleng.com

7. Curing

The slab should be cured for seven days after removing the shuttering. Curing plays an important role in achieving the desired concrete strength. For curing, water is sprayed.

Advantages Of Floating Slab

 A floating slab can keep moisture out of the floor. It is used to separate the ground and the superstructure. Additionally, it protects against water and frost.

 This slab has the spreading property, which allows vertical loads or stresses to be distributed over a larger area.

 A floating slab is a good option if your home requires an extension. This slab serves as a physical barrier between the superstructure and the ground. This prevents water and frosting. As a result, this slab is mostly used in cold-weather construction.

 Don’t require a wood flooring system & 8′-0″ basement wall.

 It requires less concrete and formwork for more economical and ecological construction.

 No footer trenches are required for this slab. They can be poured by trenching or excavating, which is a less expensive method. This slab causes no disturbance to the earth beneath it.

 Floating slabs can be heated with radiant floor heat, which provides a comfortable and balanced heat.

 Floating slabs are the best choice where the soil layer has a chance of shifting, primarily because of high moisture content.

 Cheaper house insurance because there is no basement to flood or chance of Radon gas infiltration.

floating slab

Disadvantages Of Floating Slab

 It uses outdated technology.

 Less design resonance exists in foundations with floating slabs.

 Loss of storage space.

 Because there is no space in the floating slab for a sewage line, a trench must be dug during the construction.

 Floating slabs are ineffective for overloaded bearing structures.

 Repairing a floating slab is costly.

 Sometimes, the resale value of the house is lower because of the missing basement.

Uses

​Floating slabs are mostly used for the following buildings

  • Accessory buildings
  • Garages 
  • Drive sheds
  • Houses & cottages
  • Barns.

So that’s all about the floating slab. I hope you now have enough knowledge about it. Please share any questions you may have in the comments section.

Types of building

What Is Building?

A structure with walls and a roof standing more or less permanently in one place is commonly known as a building. For example a house or factory. Buildings serve several societal needs – primarily as shelter, living space, privacy & security, to store materials, workspace, etc. In this article, different types of buildings are discussed.

Types Of Buildings. 

Depending upon the character of occupancy or the type of use, buildings can be classified into different categories as follows:

1. Residential Buildings

A building should be considered a residential building when more than half of the floor area is employed for dwelling purposes. Other buildings should be considered non-residential.

A residential building is one that’s designed and accordingly built for inhabitants to measure in and call House. Inhabitants can either be a family, single, a couple, roommates or may be in a group.

A residential building has basically:

A sleeping room(bedroom)/space,

A living room/space,

Conveniences (as in toilet and bath),

Cooking room/area (kitchen).

All of those functions can either be in shared rooms or spaces or have exclusive rooms per function. These types of buildings include one or two private dwellings, apartment houses (flats), bungalows, duplexes, storey houses, terrace buildings, apartment buildings, condominium buildings, hotels, dormitories, semi-detached buildings, etc.

2. Educational Buildings

These buildings include any building used for school, college, or daycare purposes involving assembly for instruction, education, or recreation.

3. Institutional Buildings

These buildings include any building or part which is used for medical treatment etc. Such as Hospitals, nursing homes, orphanages, sanatoria, jails, prisons, mental hospitals, etc.

4. Assembly Buildings

These buildings may include any building or part of a building where a group of people gathers for recreation, amusement, social, religious, or such types of purposes such as theaters, assembly halls, exhibition halls, restaurants, museums, club rooms, auditoria, etc.

5. Business Buildings

These shall include any building type or part of a building that is used for business transactions, keeping records of accounts, town halls, city halls, courthouses, etc.

6. Mercantile Buildings

These shall include buildings used for soap, markets, stores, wholesale or retail.

7. Industrial Buildings

These types of building are mainly used for manufacturing purposes. Here products or materials of all kinds and properties are fabricated, assembled, or processed, for example, gas plants, refineries, mills, dairies, etc.

8. Storage Buildings

These buildings are generally used for the storage or sheltering of goods, wares, or merchandise like warehouses, cold storages, garages, stables, transit sheds, etc.

9. Hazardous Buildings

These types of buildings include any building which is used for storage, handling, manufacturing, or processing of highly combustible explosive materials or products that are liable to burn extremely rapidly, which may produce poisonous fumes.

This building is used to store, handle, or manufacture highly corrosive, toxic, acid or other liquids or chemicals that produce flame, fumes, explosives, etc.